You are currently browsing the tag archive for the ‘apples’ tag.
This right here is a big bowl of hearty, spicy autumnal goodness. I’ve never had a chili like this before. I’m a big fan of the beef and beans kind of chili, topped with cheddar cheese and sour cream, and I love a good plate of Cincinnati chili with its chocolatey notes, served on top of spaghetti.
This one is different. This one is autumn in chili form. This is chili with butternut squash and apples and it’s thick and chunky and beany and unexpected and extremely satisfying. I’ll definitely be adding this recipe to my repertoire – it’s a keeper.
Note – use a big pot for this. Admittedly, I used a huge butternut squash (I’m crazy for butternut squash) and my 7 quart Martha Stewart Dutch oven was barely big enough for it, but I think my 5 quart Dutch oven wouldn’t have worked well here.
Autumn Harvest Chili
Adapted from Better Homes and Gardens, October 2011
3 Tbsp Olive Oil
1 1/2 lb cooked chicken-apple sausage links, cut in 1 inch pieces
2 large red onions, chopped
3 cloves garlic, minced
1 large butternut squash, peeled, seeded and cut into 3/4 inch chunks (about 6 cups)
2 teaspoons chili powder
1/4 teaspoon table salt
1/4 teaspoon cayenne pepper
3 cups reduced sodium chicken broth
3 medium Granny Smith apples, peeled, cored, and cut into 3/4 inch chunks
2 cans pinto beans (or kidney beans), drained and rinsed, 1 can slightly smashed
1 Tablespoon fresh sage, chopped
Gala or other apples, cut in rings
- In a large Dutch oven, heat 1 tablespoon olive oil over medium-high. Add sausage; cook 5 to 6 minutes, stirring occasionally, until browned. Remove with a slotted spoon.
- In the same pot, add 1 tablespoon olive oil and cook onions for 2 minutes, stirring occasionally. Add garlic and cook for 1 minute more, until onion is nearly tender. Add squash and cook 5 minutes. Stir in chili powder, salt, and cayenne pepper. Cook 1 minute. Return chicken to pot and add broth. Bring to a boil, then reduce heat and simmer, covered, 8 minutes.
- Meanwhile, in a large skillet, heat remaining 1 tablespoon olive oil over medium high. Cook apples 4 to 5 minutes, stirring occasionally, until light brown. Transfer apples along with beans to chili. Simmer 3 to 4 minutes, until apples are tender. Top with sage and apple slices. Makes 8 servings.
We’ve been having a lot of rich, cakey and often chocolatey desserts lately, it seems, and I wanted to change things up. Maybe something with fruit. Because fruit makes it healthy, right?
RIGHT?!
I thought so.
An apple crisp with a good, crunchy, oat-y topping seemed like just the thing. And then I remembered a recipe for cinnamon ice cream that popped up in my google reader in the fall. Apple crisp with homemade cinnamon ice cream? Yes please!
The recipe came together fairly quicky, once I peeled and chopped up all the apples. I was rushing and some of the apple chunks were a bit big, so there were some bites that were still pretty crunchy. I think next time I’ll slice the apples rather than make chunks, because they didn’t really cook down to my liking. I liked that the topping whirled together very quickly in my food processor. It’s a very yummy crisp, and the topping is really good.
But the star of the show was definitely the ice cream. I was bustling about the kitchen making dinner while James emptied the ice cream maker into a Tupperware so we could pop it into the freezer to firm up before dinner, when he stopped me with a spoonful of the ice cream. It knocked my socks off! It’s rich and delicious with a wonderful cinnamony flavor. You wouldn’t even know it doesn’t have eggs in it, it was so rich and creamy.
Apple Crisp
From America’s Test Kitchen Family Baking Book
For the filling:
3 lb apples (6 to 9), cut into 1/2 inch pieces
1 teaspoon cornstarch
2 to 4 tablespoons sugar
2 teaspoons fresh lemon juice and 1/2 teaspoon cinnamon
For the topping:
1/2 cup walnuts, toasted (or almonds or pecans)
1/2 cup all purpose flour
1/4 cup packed brown sugar
2 tablespoons granulated sugar
1/4 teaspoon cinnamon
1/8 teaspoon nutmeg
1/8 teaspoon salt
6 tablespoons unsalted butter, melted
1/2 cup old-fashioned oats (I used quick oats)
1. Adjust oven rack to the middle position and heat the oven to 400 degrees. Mix together the apples, cornstarch, sugar, lemon and cinnamon. (I also added a pinch of nutmeg and cloves.) Transfer the fruit filling to an 8-inch square baking dish, cover with foil, and set on a foil-lined rimmed baking sheet (for easy cleanup) (I forgot to do this and it wasn’t an issue). Bake the fruit until it is hot and has released its juices, 20 to 25 minutes.
2. Meanwhile, pulse the walnuts, flour, sugars, cinnamon, nutmeg, and salt together in a food processor until the nuts are finely chopped, about 9 pulses. Drizzle the melted butter over the top and pulse until the mixture resembles crumbly, wet sand, about 5 pulses. Transfer the mixture to a medium bowl and pinch between your fingers into pea-sized pieces (with some smaller loose bits) (oops I forgot to do this!).
3. Remove the fruit from the oven, uncover, and stir gently. Sprinkle the topping evenly over the fruit. Bake the crisp until the topping is deep golden brown and the fruit is bubbling, about 15 minutes, rotating the dish halfway through baking. Let the crisp cool for ten minutes before serving.
Cinnamon Ice Cream
I got it from Erin’s Food Files. Erin got it from Demolition Desserts, by Elizabeth Faulker, as seen on MarthaStewart
Yields: 4.5 cups
2 cups whole milk
1/2 cup turbinado sugar (I used regular granulated sugar)
1/2 cup pure maple syrup
2 teaspoon ground cinnamon
2 cups heavy cream
1 teaspoon pure vanilla extract
1 teaspoon coarse salt
Prepare an ice-water bath; set aside.
Combine the milk, sugar, maple syrup, and cinnamon in a medium saucepan over medium heat. Cook, stirring occasionally, until mixture just begins to bubble and sugar has dissolved, 6 to 8 minutes. Add cream, vanilla, and salt; stir to combine. Pour mixture into a medium bowl set in the ice-water bath. Stir occasionally until cooled. Cover and transfer to refrigerator until chilled at least 1 hour and up to overnight.
Stir mixture briefly; pour into an ice-cream maker and process according to manufacturer’s instructions. Store ice cream in a covered container in the freezer, at least 1 hour and up to 1 week. Ice cream is best served within 3 days.
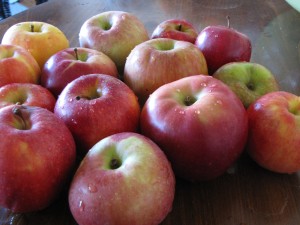 When I was little, my parents would pack us in the car for a day trip to Lancaster County, PA – the heart of Amish Country. They’d drag us from store to store, loading up on cheap groceries, great-tasting local milk, bulk bags of old-fashioned oats and dried fruit for my dad’s homemade granola. One of the highlights of the trip for us kids, aside from seeing the horse-drawn carriages and the people dressed in funny clothes, was the store where my parents bought the bulk dry goods. After our initial inspection of the shelves full of row after row of neatly arranged bags of raw cashews, dried apricots, sunflower seeds and who knows what else, we were inevitably drawn to the table that held the free samples of apple butter and apple cider. While my parents shopped, my siblings and I crowded around the table, scooping up way more than our fair share of apple butter with little oyster crackers, and devoured the spicy-sweet goodness.
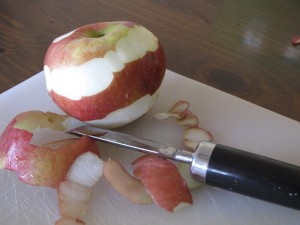
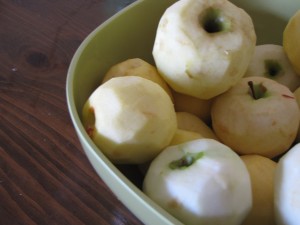 Since then, apple butter has held a special place in my heart, a comforting yet elusive old favorite. It’s not something I find in most grocery stores, and when I do, it’s too overpriced for me to consider buying it. Every once in a while, my mom would return from their annual trip to Lancaster County with a jar of apple butter for me to take back to college or graduate school, but it’s a rare treat.
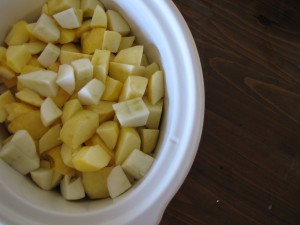
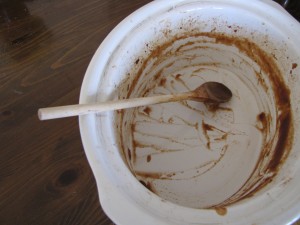
Had I known how ridiculously easy it is to make, I would’ve been having apple butter a lot more frequently.
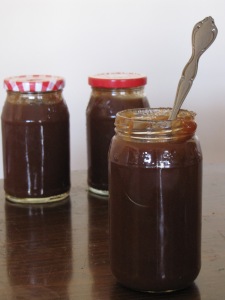
I found this recipe on yumsugar.com, knew at once that I had to make it immediately, and then finally got around to it a year later. Shameful, especially considering how awesome this stuff is. I could eat it with a spoon (and believe me, I have), but I’m definitely looking forward to smearing some on a toasted cinnamon-raisin bagel tomorrow morning.
One word of caution: this recipe takes a long time to make. The majority of the time is hands-off while it’s simmering in the slow cooker, but don’t start this in early afternoon if you want to go to bed early.
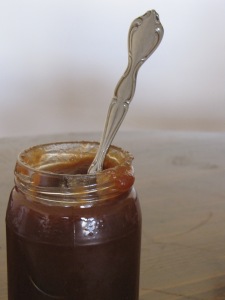
Added bonus: this makes your house smell amazing all day long.
Apple Butter
from Yumsugar.com
Ingredients
5 1/2 pounds apples – peeled, cored and roughly chopped
1 cup sugar
1 cup brown sugar
2 teaspoons ground cinnamon
1/4 teaspoon ground cloves
1/4 teaspoon salt
Directions
Peel, core and chop your apples. Don’t worry too much about the chopping part because they will cook down and you will blend them all down to a saucy consistency later. Toss all the ingredients into a slow cooker (or heavy pot on the stove). Cover and cook on high heat for the first hour. Then turn the heat down to low for 8 to 10 hours. Take the cover off, blend until smooth and turn the heat back up to high for another hour or until most of the liquid is gone. Spoon into jars or freezable containers and pop in the fridge or freezer.
Notes: This can be done one the stove with a heavy pot, as well. Doing it in the slow cooker is just easier since you can throw it in, turn it on, and go have a Saturday adventure without worrying that you’re burning the house down. The one difference for cooking it on the stove: use medium high heat for the first and last hour. Also, I checked on mine every couple of hours, stirring it and making sure it wasn’t burning. When the apples started breaking down on their own, I moved on to the blending step – I don’t think I waited the full 8 hours. Finally, this makes a lot of apple butter – clear out some freezer space or be prepared to give it away to friends and neighbors.


