You are currently browsing the tag archive for the ‘whole grains’ tag.
On Fridays, my husband can come home for lunch (he works 15 minutes away), so I like to make a hot meal to give him some variety from his regular cold sandwiches. He never knows what he’ll come home to – sometimes it’s a tuna melt, sometimes it’s a stew, sometimes it’s soup. Today, it was curried lentils in tomato sauce over brown rice.
I’m on a avoid-sugar-and-white-flour kick right now, and I’m trying to stay away from bread altogether. I’ve found that cutting bread from my diet makes lunchtime tricky, so I’ve been sifting through the healthy vegetarian recipes on MarthaStewart.com searching for easy, interesting dishes that would work well for lunch – and that’s where I found this.
Granted, eating a super healthy lunch may take a bit more planning than slapping together my beloved peanut butter and jelly sandwich, but it is rewarding. Tucking into this bowl of hearty, flavorful and nutritious lentils was pretty great. It’s spicy and delicious, with just the right amount of kick. It’s very filling, and it’s loaded with good-for-you nutrients like folate, potassium and iron. Lentils are also a good source of fiber and protein. A meal that’s both incredibly healthy and incredibly delicious? I don’t want to brag, but there were some high fives after lunch.
Curried Lentils in Tomato Sauce
Adapted slightly from Martha Stewart Everyday Food, March 2007
- 2 cups dried lentils, rinsed and picked over*
- 3 tablespoons vegetable oil
- 1 medium onion, finely chopped
- 1 piece fresh ginger (2 inches long), peeled and finely grated (my piece was big and fat so there was a lot of ginger)
- Coarse salt
- 2 teaspoons curry powder
- 1 teaspoon garam masala (optional – I used it)
- 1/4 to 1/2 teaspoon cayenne pepper
- 1 jar (26 ounces) best-quality store-bought tomato sauce (I used Prego Chunky Garden Combo)
- 2 tablespoons fresh lime juice (from 1 lime)
- 1/2 cup chopped fresh cilantro, plus more for garnish (optional)
- Cooked brown rice, for serving
- In a medium pot, combine lentils with 2 cups of water. Bring to a boil over high heat, then reduce to a simmer and cover. Cook for 20 – 30 minutes, topping off water as needed. Lentils are done when easily mashed with a fork.
- In a large saucepan, heat oil over medium. Add onion and ginger; season with salt. Cook, stirring frequently, until beginning to brown, 5 to 8 minutes.
- Add spices; cook, stirring, until fragrant, 30 to 60 seconds.
- Add tomato sauce, lentils, and 1 cup water. Simmer until slightly thickened, 5 to 10 minutes. Test lentils – if they are still a bit gritty as mine were, add another half cup of water and continue to simmer for 10 minutes. When the lentils are ready, stir in lime juice and cilantro; season with salt.
*The original recipe called for 2 cans of lentils, rinsed and drained.

I made these tasty morsels for a friend who’s in the hospital. Hospital food is just dreadful and it’s unfortunate that hospitals don’t seem to make the connection between nutritious food and healing. This guy is recovering from a major illness and they’re serving him super-processed, unappetizing, vegetables from a can, white rice, corn syrup-laced food that he can barely choke down. Isn’t that horrible? So he made a request for visitors to bring him healthy dinners. When I first visited (with a serving of autumn harvest chili in tow), one thing that stood out in my conversation with him was that breakfasts at the hospital are terrible, too. You’d think breakfast would be relatively easy to do well, but they’re not – horrible pancakes with disgusting maple-flavored corn syrup, cold cereals with minimal whole grain but plenty of sugar, that sort of thing. And one can only take so many days of oatmeal.
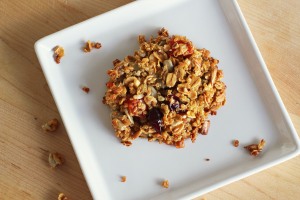
So I looked in my Power Foods cookbook for something nutritious and wholesome that would work for breakfast and that would keep well at room temperature for a few days. These fit the bill perfectly – they’re full of whole grains in the form of oats and quinoa, plus nuts, seeds, and dried fruit, and lightly sweetened with honey.
They’re tasty, chewy, nutty (the quinoa, oats and sunflower seeds are all toasted in the oven to give them all a nice nutty flavor), and above all nutritious. I hope my friend enjoyed these, I’ve been loving the leftovers! These make a great snack, too, and would be a perfect addition to a lunch box. I’ve been enjoying them crumbled over plain nonfat Greek yogurt for lunch.
Quinoa Granola Clusters
Adapted from Martha Stewart’s Power Foods
1 1/2 cups water
3/4 cups white quinoa, rinsed and drained
1 1/2 cups old fashioned rolled oats
1/2 cups raw cashews (or other nut), coarsely chopped
1 cup dried fruit, coarsely chopped (I used dried apricot, mango, and cranberries)
1/2 cup raw sunflower seeds
1/4 cup flax seeds (I used Trader Joe’s Golden Roasted Flax Seeds)
1/4 cup sugar
1/2 teaspoon coarse salt
1/4 cup honey
2 tablespoons neutral-tasting oil, such as canola
1 1/2 teaspoons vanilla extract
2 large eggs plus 1 large egg white, lightly beaten
Vegetable oil cooking spray
- Preheat oven to 350 degrees. Bring the water to a boil in a small saucepan. Add quinoa; return to a boil. Stir once; cover, and reduce heat to a simmer. Cook until quinoa is slightly underdone (it will finish cooking in the oven) and has absorbed most of the liquid, about 12 minutes. Using a slotted spoon, transfer quinoa to a rimmed baking sheet. Bake, fluffing with a for occasionally, until pale golden, 30 to 35 minutes. Transfer to a large bowl and let cool.
- Spread oats evenly on the baking sheet. Bake, stirring occasionally, until lightly browned, about 15 minutes. Add oats to bowl with quinoa. Spread sunflower seeds on baking sheet; bake, stirring occasionally, until lightly toasted, about 7 minutes. Add to quinoa mixture; let cool. Reduce oven temperature to 300 degrees.
- Toss nuts, fruit, sugar and salt in with quinoa mixture. Mix honey, oil, vanilla and eggs together; stir into quinoa mixture.
- Line an unrimmed baking sheet with parchment paper; lightly coat with cooking spray. Place 1/4 cup mixture onto sheet for each cluster, spacing them 3 inches apart. Flatten to 1/4-inch thick. Bake, rotating sheet halfway through, until crisp, about 25 minutes. Let cool on baking sheet for a couple of minutes, then transfer to a wire rack to cool completely. Store in an airtight container for up to one week.
There is something so charmingly retro about this recipe, which is what drew me to it in the first place. Pressing cooked quinoa into a pie plate and then unmolding it onto a platter so the neat circles of butternut squash are attractively displayed on top seems like such a weird thing to do to quinoa. It’s something that they would’ve done in the 1960’s when American cuisine was all about Spam and pineapple upside down cakes. If my husband had been around when I stumbled across this recipe, he probably would’ve been hesitant to try it when my first reaction was “This looks so weird – I have to make it!”
But I’m not one to let a quirky 1960’s vibe dissuade me from trying out a recipe. So I made it as a side dish for dinner one night, and after we both marveled at this odd way of serving quinoa, we tried it. Holy cow, it’s good! It’s actually really tasty! I know the pie shape has nothing to do with the flavor, but it did cause some doubt. Well, I’m here to tell you that you don’t need to worry, I’ve tested it out, and this is a really yummy dish. It’s great as a side dish, but it would also work really well as a light lunch with a little side salad. It’s so healthy, all whole grains and veggies, it’s an easy way to slip some wholesome goodness into your meal.

Quinoa Pie with Butternut Squash
From Martha Stewart Living, November 2006
1 tablespoon extra-virgin olive oil
1 butternut squash (about 1 1/2 pounds), peeled, havled crosswise, and seeded
18 fresh sage leaves, plus 1 teaspoon finely chopped sage
1/2 onion, cut into 1/4-inch dice (about 3/4 cup)
1 garlic clove, minced
1 cup quinoa
2 cups homemade or low-sodium store-bought vegetable stock
1 1/2 ounces Parmesan cheese, finely grated
1 teaspoon coarse salt
1/8 teaspoon freshly ground pepper
Vegetable oil, cooking spray
- Preheat oven to 375 degrees. Brush 2 rimmed baking sheets with 1 teaspoon oil. Cut five 1/4-inch-thick rings of squash; cut remainder into 1/4-inch dice. Place squash on sheets. Toss with 1 teaspoon oil; sprinkle with 12 sage leaves. Bake until tender and just golden, 15 to 20 minutes. Let cool completely. Keep oven on.
- Heat remaining teaspoon oil in a medium saucepan over medium heat. Add onion and garlic. Cook, stirring, until translucent, 3 to 5 minutes. quinoa and stock; bring to a boil. Cover; reduce heat. Simmer until liquid has been absorbed, about 15 minutes. Remove from heat. Let stand, covered, 2 minutes.
- Stir together quinoa, diced squash, chopped sage, Parmesan, salt, and pepper in a medium bowl.
- Coat a 9-inch glass pie plate with cooking spray. Arrange 6 sage leaves face down in plate; top with squash rings. Press quinoa mixture on top.
- Bake 20 minutes. Let cool 5 minutes, then invert onto a serving platter. Serve wedges warm or at room temperature.
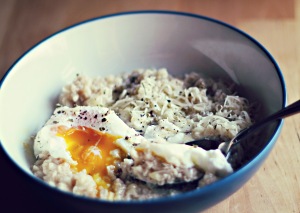
I know this sounds really strange. I never would have thought to put an egg on top of oatmeal before I saw the recipe in an issue of Everyday Food. Oatmeal toppings are things like brown sugar, raisins, cinnamon, nuts, maple syrup. An egg and cheese on oatmeal just sounded funky – oatmeal is supposed to be sweet, not savory! Right?
Well, I’m here to tell you that oatmeal totally works as a savory dish. A soft-cooked egg will make anything rich and delicious, so it makes sense that it would transform boring plain oatmeal into something irresistibly yummy. The cheese adds to the savory goodness. This is one of our favorite breakfast meals, and it’s super easy. Quick cooking oatmeal is ready in no time (you could use old fashioned oatmeal too, it will just take a bit longer), and the egg cooks up quickly too. Sometimes I poach the eggs and sometimes I fry them – both methods work well. And this meal is so hearty and filling and healthy – it’s really a perfect start to the day.
Savory Oatmeal and Egg Bowl
Adapted slightly from Everyday Food, October 2010
Serves 2
1 cup quick cooking oats
1 3/4 cup water
1/4 teaspoon table salt
2 eggs
4 tablespoons thinly grated sharp cheddar cheese (or fresh parmesan cheese), to taste
coarse salt and freshly ground pepper, to taste
dried herbs such as thyme, parsley or chives, if desired
1. Bring water and salt to a rolling boil. Add oats and reduce temperature to medium. Cook, stirring occasionally, for 1 minute. Cover and remove from heat. Let rest for 2-3 minutes or until eggs are ready.
2. Meanwhile, prepare eggs. Lightly fry in a pan for about 3 minutes until whites are set and yolks are still runny, or poach for 4 to 5 minutes. To poach eggs, fill a large frying pan almost full with water. Add a tablespoon of vinegar and a teaspoon of salt. Bring to a simmer, almost boiling. Crack eggs into two teacups and use the teacups to gently lower the eggs into the water. Cover and remove from heat, and allow to sit for 4 to 5 minutes.
3. Dish oatmeal into two bowls, top with grated cheese and herbs, if using. Place egg on top. Season with salt and pepper.
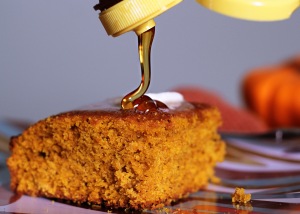
This recipe is a bit of foodie kismet – it came up in my Google reader shortly after I came across the recipe for Autumn Harvest Chili in Better Homes and Gardens, and I knew the two would be perfect together. Chili and cornbread are made for each other, so it makes sense that an autumnal twist on cornbread would be delicious alongside an autumnal twist on chili. And I was right. I love cornbread, I love pumpkin bread, and now – I love pumpkin cornbread.
And if you decide to make some pumpkin cornbread, may I suggest some of this action:
Oh yes.
Mmm…
Gimme some of that!
Seriously, you guys. This is great cornbread. Perfect for pairing with any fall recipe.
Pumpkin Cornbread
1 cup all purpose flour
1 Tablespoon baking powder
1 teaspoon kosher salt
½ teaspoons ground cinnamon
¼ teaspoons ground nutmeg
½ cups brown sugar
1 cup cornmeal (not stoneground)
2 large eggs
1 cup pumpkin puree
¼ cups olive oil
1 Tablespoon molasses
- Preheat the oven to 400 degrees and grease an 8×8″ baking dish.
- In a medium bowl, whisk together the flour, baking powder, salt, spices, brown sugar, and cornmeal.
- In a small bowl, lightly beat the eggs, and then stir in the pumpkin, oil, and molasses.
- Stir the wet ingredients into the dry ingredients just until combined, and then pour the batter into the pan, smoothing out the top as much as possible. The batter will be quite thick.
- Bake 30 minutes or until a knife inserted in the center comes out clean. Serve warm.
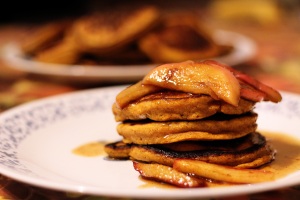
I’m a bit obsessed with all things pumpkin right now, so I saw these pumpkin pancakes in my Google reader yesterday, I decided right away that this was what we’d be having for breakfast today. And we did. And they were fantastic! They’re spicy and wholesome and the apple-cinnamon-maple compote really takes them over the top. They taste like a plate of autumn. I actually forgot that they were 100% whole wheat at first, you really don’t notice it – they’re just as light and fluffy as you could ask for.
Whole Grain Pumpkin Pancakes
1 tablespoons pumpkin pie spice*
1 cup pumpkin puree (not pumpkin pie filling)
butter, to serve (and for pan)
Apple Cinnamon Maple Compote
I like to have healthy, interesting things for lunch – I find the same old peanut butter and jelly or meat and cheese sandwiches every day tend to get tired. I really like to mix things up with whole grain salads that are really self-contained, perfect little meals: protein, whole grain, and vegetable. I like it – and I don’t do it nearly enough. Hardly at all, if we’re being completely honest: sandwiches are just so stinkin’ easy.
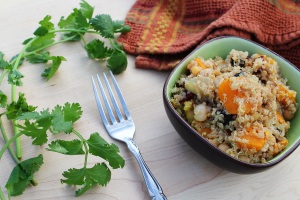
However. If you’re willing to put in a wee bit more effort than slathering a slice of bread with peanut butter, you can have a tasty, flavorful, interesting meal that is both delicious and healthy. You’ll walk away from your lunch thinking, “Wow, I just did something really good for myself.” And maybe your good lunchtime behavior will inspire you to skip that 3pm trip to the vending machine, who knows.
The point is: this is a delicious meal, easy to prepare the night before and toss in your bag or briefcase and really, I should make it more often. And so should you.
Quinoa Salad with Butternut Squash and Cranberries
adapted from Erin’s Food Files
Makes about 5 Servings
1 medium butternut squash (or other hard winter squash), peeled and cut into 1-inch pieces
1 cup uncooked quinoa
2 cups water
1 onion, diced
4-5 tablespoons white wine vinegar
2 tablespoons olive oil
Zest of one orange*
1/2 teaspoon coriander
1 teaspoon cinnamon
1/2 teaspoon nutmeg
1 teaspoon cumin
1 teaspoon salt
1 can garbanzo beans, drained and rinsed
1/2 cup dried cranberries**
- Preheat oven to 400 degrees. Toss squash and onion with a bit of olive oil and spread on a baking sheet. Roast vegetables, stirring occasionally, until tender – about 30 minutes. Allow to cool before combining with other ingredients.
- Place the quinoa and 2 cups of water in a medium pot and bring to a boil. Reduce to a simmer, cover and cook until all the water is absorbed, 10-15 minutes.
- In a small bowl, whisk together vinegar, 2 tablespoons of olive oil, zest (if using), spices, and 1 teaspoon salt. In a large bowl, combine squash and onions, quinoa, garbanzo, and dried fruit. Pour on the dressing and stir to combine. Taste to check seasoning. This salad can be served room temperature or cold.
*I skipped this because I didn’t have an orange, and it was fine without it.
** My grocery store was all out of dried cranberries, so I used something called “antioxidant blend,” which was a mix of dried plums, blueberries, cherries and cranberries. It worked well.

I’m trying to add more whole grains into our diet. James and I generally eat well, we eat a lot of whole foods and keep processed foods to a minimum. But I realized recently that while we get about our recommended amount of fruits and vegetables and definitely get enough dairy (we’re big milk drinkers), we weren’t coming close to the daily recommended amount of whole grain. So we’ve switched from regular “whole grain” cold cereal to Bob’s Red Mill whole grain hot cereals, which consist of ground up whole grains… and that’s it. No white flour, no sugar, no preservatives. I’m trying to have more whole grains as sides at dinner, like brown rice and quinoa. Now that I’m not working, I’m baking 100% whole wheat bread from Artisan Bread in 5 Minutes A Day, which we use for sandwiches rather than store-bought bread.
And I’m sneaking whole wheat flour into more and more of our baked goods. I recently found white whole wheat flour in our grocery store and I’m in love. It has a more subtle flavor that regular whole wheat, and you really can’t detect it when you sub out half of the AP flour in a recipe for white whole wheat. So when I made these pancakes this morning, I used 1 cup white whole wheat and 1 cup AP flour, and they came out light and fluffy and delicious and James was surprised when I told him they were half whole wheat.
This weekend is the New Hampshire maple producers open house weekend, so James and I drove up yesterday to visit two sugar houses to see how they make maple syrup and to sample maple products. We first stopped at the Maple Butternut Farm in New Boston, and then we went to the Grant Family Pond View Maples in Weare.
Both are family-run operations – I suspect most if not all of the sugar houses in NH are family owned and operated. We drank little shots of pure maple syrup at both houses, and at the second one we also had maple hot dogs (cooked in maple water), maple chili, maple popcorn, and maple cotton candy. Yum yum!!
It was awesome to taste all that maple-y goodness and really interesting to meet the people to make the syrup and learn about how they do it. Of course we came home with a fair amount of maple products: A pint of maple syrup from each of the sugar houses, maple cream, maple butter, and maple sugar.
So of course this morning I had a big craving for pancakes! These babies hit the spot. Light and fluffy with a nice tang of buttermilk, and heartier than normal pancakes thanks to the whole wheat. Delicious! Especially topped with super yummy New Hampshire maple syrup.
Whole Wheat Buttermilk Pancakes
Adapted from Cook’s Illustrated Family Baking Book
1 cup all purpose flour
1 cup white whole wheat flour
2 tablespoons sugar
2 teaspoons baking powder
1/2 teaspoon baking soda
1/2 teaspoon salt
2 cups buttermilk
3 tablespoons melted unsalted butter
1 large egg
extra unsalted butter for the pan
- Adjust an oven rack to the middle position and heat the oven to 200 degrees. Set a wire rack over a baking sheet and set on the oven rack.
- Whisk together flour, sugar, baking powder, baking soda, and salt in a large bowl. In a 4-cup measuring cup, measure out buttermilk and then add melted butter and egg (you can use a medium bowl for this, but using a 4 cup measure saves you from having to wash an extra bowl while giving you room to whisk). Whisk wet ingredients together and add them to the dry. Gently fold the wet and dry ingredients together until just incorporated, with a few lumps remaining. Do not over mix. The batter will be very thick.
- Heat a skillet or griddle pan over medium heat for 3 to 5 minutes. Test with a few drops of water sprinkled on the surface – the pan is ready when the water immediately dances across the surface. Brush the pan with some butter. Using a 1/4 cup measure, scoop the batter onto the skillet and cook until large bubbles begin to appear, about 2 minutes.
- Flip the pancakes and continue to cook until golden brown, about 1 1/2 minutes. Transfer pancakes to wire rack in the oven to keep warm. Repeat with remaining batter, brushing the pan with butter as needed. Serve with maple syrup!
I’ve proclaimed myself as a lover of homemade granola around these parts before, so I’ll keep this brief. I love granola. My dad has been baking up the same homemade granola recipe for as long as I can remember, but I like to mix things up and try different recipes and combinations of fruits and nuts.
This recipe comes from Martha Stewart, but she calls it honey-pecan granola. Well, I didn’t have any pecans (I’m not big fan) and I like my granola to include at least a little fruit, so this is my riff on her recipe. This is more delicately flavored than my maple granola recipe, and I kept it simple with limiting my fruits to coconut and golden raisins. It’s yummy with milk or sprinkled on top of yogurt. Feel free to adjust the fruits and nuts in this recipe to suit your taste!
Nutty Honey Granola with Golden Raisins
Adapted from Martha Stewart
3 cups old fashioned rolled oats
1 1/2 cups roughly chopped nuts ( I used a combination of walnuts, almonds, and cashews)
1/4 cup flax seed meal (optional)
1/4 cup wheat bran (optional)
3 tablespoons unsalted butter, melted
1/3 cup honey (I prefer clover, Martha recommends something stronger-tasting like orange blossom)
1/2 teaspoon coarse salt
1/2 cup sweetened shredded coconut
1/2 cup golden raisins
Preheat oven to 300 degrees. Line a rimmed baking sheet with parchment paper. In a large bowl, combine all ingredients except for the raisins and mix well. Spread granola onto baking sheet in an even layer. Bake until oats and coconut are lightly golden, about 30 minutes, stirring halfway through. Let cool completely on sheet and then mix in the raisins. Store in an airtight container at room temperature up to 3 weeks.


